Showing posts with label Drawing Practices. Show all posts

Sunday, November 23, 2014

Interview on The Elusive Muse

Here is an interview with me, published on The Elusive Muse recently.  Check out some of the other artists interviewed too - they represent a broad spectrum of work.

I am going to copy the last question and answer here.  It seems to have resonated with a few who commented, so you might want to skip the interview and see if this little pep talk is of any interest:

8. Do you have any tips or advice for aspiring artists?
Yes. Make a lot of art. Make really a lot, and give art making a higher priority, by a long shot, than even taking classes or reading books about art making. It is important to get instruction and to learn techniques, but it takes time, and LOTS of art making, to absorb whatever you learn and make it your own. In the same way, it is important to look at other art, get inspiration from other artists, but it is only in the making of art that you gain from the inspiration.

I think really good and authentic art comes from being on your edge, pushing yourself just a bit beyond what feels comfortable, from NOT-knowing. If you feel out on a limb, sometimes frustrated, not sure what to do next, then you are probably doing it RIGHT. Often I find that aspiring artists have the idea that they SHOULD know what they are doing, plan out each piece of art knowing exactly where they are going, and feel competent the whole way. I say, change your expectations: let yourself get uncomfortable and out-in-the-middle-of-nowhere, and practice that state of uncertainty.

Do not worry about developing your own “style”. Just make art, and your voice will emerge. If you try to force it, you will only limit yourself. Just my two cents.

There.  Enough of my ranting. Tomorrow I will post the winner for the Extreme Composition online workshop giveaway.

Sunday, August 10, 2014

An Attitude of Practice

Here are a few examples of pieces that started with Speed Painting.  These are on 9"x12" Cheap Drawing Paper.  I consider them practice.  Practice making marks, practice working in series, practice questioning and exploring*.  Paradoxically, though not surprisingly, when I work with this attitude of practice, I loosen up and make my best work.  Continuing to cultivate this approach, in all my work, is what I strive for.


 The following are demonstration pieces I made in Santa Fe.   These are the fall out from the same approach to the speed painting, though using different techniques.


Any approach that gets you going, gets you making marks without trying so hard to make Good Art, can be used to cultivate this practice, help you get out of your own way and find a freer path to creative expression.  We explore lots of these exercises in Big Fat Art and Art Therapy for your Inner Critic, coming up in October.  See Drawing Blind and Stacks of Shapes for two other ways to explore mark making on cheap paper.  It's FUN!

*If they turn into "pieces", pieces I would keep/exhibit/sell/frame, I simply coat the back side of the paper with acrylic matte medium.  This makes the piece archival and sturdy.

Monday, April 16, 2012

Sketchbook In Progress

Thanks for all your comments on the gel plate work. It is fun fun FUN, and I'll be doing more.  Meanwhile, I am totally blown away by the work that's happening in my Sketchbook Practice class!  Check this out:
This is an exercise in exploring line.
And this is about circles.
Who knew you could get such fabulous variety from fairly simple exercises.  I will be offering this class again in the fall, date to be determined, but will definitely incorporate some of the exercises in my Collage Journeys in Vermont workshop this summer.  Thanks for visiting!

Saturday, January 21, 2012

Sketchbook Practice Online

I've been having a ball with my Sketchbook Practice workshop here in Vermont, and enough of you expressed interest in an online version that I am now offering that as well, starting on April 4.  We will do some drawing practice, collage doodles, ink doodles, self-portraits, and generally give our ideas room to percolate and play.

Give your art practice a boost this spring and join The Sketchbook Practice Workshop online. Or just get out your sketchbook, make a pot of tea, and draw something, play with paint, collage, or explore the media of your choice.  See my tutorials or The Sketchbook Challenge Tutorials, or just go to the Sketchbook Challenge blog for some inspiration.

Friday, April 22, 2011

Friday Drawing Practice

I am going to postpone the Drawing With Values exercise because I want to share an easy and fun doodle exercise that Sue Bleiweiss and I did in our Sketch-In at Ink About It. It begins with Diana Trout's Doodle Game, which is on the Sketchbook Challenge Tutorials page. I urge you to watch her video and try it! I took it in a slightly new direction in honor of this month's Sketchbook Challenge theme: Branching Out / Out On A Limb.


To see my results, click here.

I hope you have fun with this. Thanks for visiting! Take my survey about your art practices and preferences. THANKS! It will help me with my Friday Practice series.

Friday, April 15, 2011

Playing with Value

In today's Drawing Practice exercise we are going to see how we can get a range of values (light to dark) in a few different materials. Leave color out of it for now, and just see if you can create very light areas, very dark ones, and a range in between.

For now we are just experimenting with different materials; next week (yes, I know I said I would do six Drawing Practice posts, but I'm doing one more) we will use these values to make drawings.

Choose a drawing implement, such as pencil, and start scribbling. Make as many kinds of marks as you can by varying the speed, the pressure, and so forth. Then try to create a range of values from dark to light.

In this one I used pencil, cross-hatching to varying degrees creates the value range.


Same thing in black fine tip felt pen. Here I tried to create different qualities of value by making some areas with more or less straight lines intersecting, and others with loopy scribbles.

I found the black crayon (crayola) the least interesting of my materials. I was surprised, though, that I could actually get a very dark black.


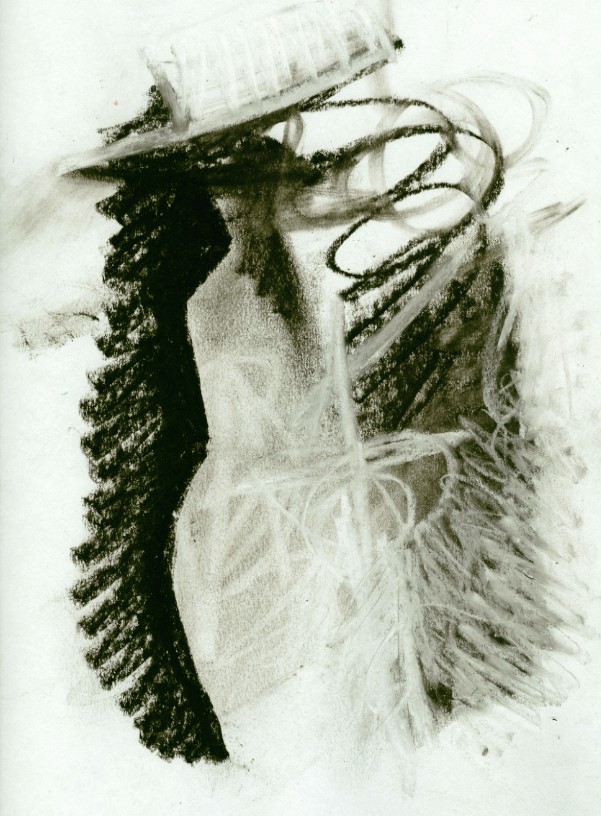
In this final one I used charcoal as well as white pastel. I used a kneaded eraser to smudge and make lines through the charcoal areas. Charcoal and pastel are so dusty, I really don't enjoy working with them. But they do offer such cool possibilities.

Hope you enjoy playing with values this week. We'll see what we can do with them next week. Thanks for visiting!

Friday, April 8, 2011

Hand Drawings

For this Friday Drawing Practice I wanted to find a way to combine contour and gesture drawing techniques. I was going to set up a still life and draw it in various styles, but couldn't find objects that inspired me, just the same old jars of brushes and paint bottles that fill every available surface... So we're drawing hands this week. This is a real branching out for me, as I have never drawn my own hands before.

Here is my first attempt:

I am left-handed, mostly, so I drew my right hand.

I thought the hand might be more interesting if it were holding something, so I gave that a try:

For someone who was starting to feel somewhat competent drawing, I sure was feeling out on a limb with this exercise!

So why not take it a bit further and try drawing with my non-drawing hand?


Not a whole lot different from the one done in my drawing hand. But I was having fun now, and decided to do it again, this time bringing in a bit of gesture drawing from the last drawing practice session.

Here I'm holding the brayer in my right hand, drawing with my left:


And holding it with my left, at a different angle, drawing with my right:

This week's drawing practice became less about combining contour and gesture, and more about switching hands and drawing something new. This is one I definitely want to practice! Thanks for visiting.

Thursday, March 31, 2011

Friday Drawing Practice, Drawing Through Freezer Paper

Hello, and welcome to the fourth post in the Drawing Practice Series. Today we're going to explore a kind of "gesture drawing", in which you work quickly and try to capture the gesture and volume of the object you are depicting. I chose my iron, just because it was handy.


In gesture drawing, you look at the object and at your paper, but instead of trying to capture the precise outlines or contours, you use your lines to capture more of the attitude of the object. In the following video I did speed up the gesture drawing a little, so it wouldn't take too much time, but I am definitely working quickly. I first do a drawing directly in my sketchbook. Then I draw on the back side of freezer paper that has been coated with black acrylic paint. The effect is interestingly textural.


This is the first gesture drawing:

This is the drawing on done with freezer paper:


Thanks for visiting! Hope you enjoy this practice.

Don't forget to go over to the Sketchbook Challenge today for my April theme.

Friday, March 25, 2011

Contours with Brush and Pen

Welcome to the third of my Friday Drawing Tutorials. You've probably all heard of contour drawing: you look at the object as you draw it, only glancing down to your paper occasionally, and draw its outlines. Pretty straightforward. You can do just the very outer edge of the object, or some of the interior lines as well. The key to contour drawing is to SLOW DOWN, take your time, let your hand and your eye coordinate their movements. Use a pen. "Mistakes" are part of the experience.

Here is an early attempt at a contour drawing of my chair:


After this drawing I did another, adding some of the interior lines:


You'll be amazed at how quickly your powers of observation increase when to take a few minutes once in a while to do a contour drawing. Here is another chair I did adding a bit of cross-hatch shading:


To make it a little more juicy, try doing a contour drawing with a big, wet watercolor brush. This makes you see the contours more generally, less in detail. After the watercolor dries, try a contour drawing of the same object in pen on top of the watercolor. Here is my spray bottle:

And a jar of brushes:

In the above two examples I tried to keep the pen drawing and the watercolor drawing together, so I fudged a little on the spray bottle nozzle while drawing in pen. In this self-portrait, I did the contour in watercolor, then the drawing in pen over it without trying to coordinate it.

Try both. See where it takes you!

Friday, March 11, 2011

Friday Drawing Series

Drawing Practice


Welcome to
the first installment of a series on DRAWING PRACTICES, which I will be posting every Friday for six Fridays. It’s not a step-by-step how-to-draw course, as much as a series of suggestions for keeping your drawing practice alive.

Blind Scribble


The Blind Scribble is a good place to begin if you are either new to drawing or haven’t done it for a while. Maybe you paint, collage, sew or make assemblage with abandon, but drawing, for some reason, intimidates you. Even if you draw on a regular basis, this first practice brings you back to basics.

You need:
Paper
A pen
Other drawing materials (optional)

Put the piece of paper in front of you on your work surface. Place the pen somewhere on the paper. Close your eyes. Draw. Just move the pen around, slowly exploring the paper. Focus on the sensation of moving the pen over the paper. Now try different kinds of lines, still with your eyes closed: try wavy lines, saw tooth lines, broken lines, smooth lines, jagged lines…. Move faster, move more slowly. When you’ve had enough, stop and open your eyes. Get another sheet of paper and repeat the process.

Ways to vary this exercise:

Draw to music: draw to slow, melodic music; draw to fast rhythmic music; draw to music you hate; draw to atmospheric, non-rhythmic music. Keep your eyes closed and give your whole being over to the sound and the feeling of drawing.


Switch drawing materials: Change to a brush-tip marker, a crayon, a colored pencil, a thick graphite stick, a piece of charcoal… This one is charcoal, then I brushed water over the drawing.


Make one blind scribble drawing; switch material and make another drawing over the first one.

I used water-soluble pencil for the second blind drawing over the marker original. Then I brushed water over the pencil.


Make a blind scribble drawing, then, with your eyes open, draw into it or over it with a different material.
In this one I did a blind scribble in white crayon over the first blind scribble, then painted into it with watercolor.
For more drawing exercises, see the Tutorials page on the Sketchbook Challenge blog. I hope you enjoy these exercises; thanks for visiting!