Showing posts with label tutorial. Show all posts

Friday, October 26, 2018

New Video Series

Finally, I've finished my new series of videos on making collage papers. Here is a preview:


Stowe October, 9x12

What Else? 10x10

White Dots 9x12

Pink Collage 9x12
In this series of sixteen videos you will learn a whole new vocabulary of techniques for creating your own collage papers, including making your own stamps and stencils, spattering and dripping High Flow paint, staining tissue paper, altering printed text, using oil pastel, and much more. 

Making collage papers that are uniquely yours is a great way to engage with your materials, explore pattern, and discover new color combinations. Each video is all new, original, material. All the techniques are accessible to beginners through advanced painters. 

Buy it here. It's $29.95

Tuesday, September 19, 2017

Enhancing a Color Area

Here is a short video demo on how I like to make an area of color more interesting and nuanced.  The key is subtlety, very low contrast variations on one color:


If you play the ukulele or would like to learn how to play the ukulele, I am teaching at the Vermont Ukulele Harvest, October 14, and also taking the workshops by other teachers. Check it out!

Wednesday, January 28, 2015

Acrylic Paint 101, Part 2 - Layering

OK, here is another video demo on the basics of acrlyic paints.
  • Let your paints dry between layers.  
  • Pay attention to transparency and opacity when layering.


 Here are a few pieces that rely heavily on layering transparent and opaque paints:

10"x10", acrylic, collage, and drawing media on panel

10"x10" acrylic, collage, and drawing media on panel

8"x8" acrylic, collage, and drawing media on panel

You will get plenty of practice with paint in my workshops.  Coming up next is:

Art and Soul in Portland, Oregon 

March 2 - 8
5 spaces left in Big Fat Art
4 spaces left in Working in Series
My other workshops are full, but you can get on a wait list.

In April I am teaching for the first time at Northeast Art Workshops in Gloucester, MA

Balancing Opposites: the Yin and Yang of Abstract Composition

April 15 - 17, three-day workshop

Saturday, February 9, 2013

Making Postcards Video

Here is a little video tutorial demonstrating one way that I am making postcards.  You can use this method to make Teeny Tiny Art of any sort, postable or not.  I'll demonstrate this and other methods in a FREE POSTCARD WORKSHOP at Art and Soul in Kansas City on April 4.


Here is the 8"x12" piece that I created in the video:


And the four cards that resulted:
I will be sending these out on Monday.  Have fun with this!  You might try doing it in a group, and even collaborate on the cards.  Let me know how it goes, send me your own ideas on making postcards.   Download the Step-By-Step here.

Friday, January 6, 2012

Paper on Wood Panel

When I posted about my show at Gallery 47, some of you asked if I could do a demonstration on how to mount works-on-paper, like my collages, on wood panel, like these pieces below:


So now that my Dick Blick order has arrived, including a bunch of birch wood cradled panels, I did a little video to show you how simple this mounting technique is. It is a lot cheaper than framing, too, and gives your piece the kind of heft and object-quality of a piece on panel or canvas. So here is that video:


And here is the panel weighted by a stack of heavy books:

You can, of course, work directly on the birch panels, but I like working on paper and then selectively mounting pieces as there is a demand for showing them. They are easier to store on paper, and I feel more free to play and make a mess. I hope you find this useful!

Monday, November 7, 2011

Brayer Technique

I use a brayer - usually a 2" one - to apply paint when my collage is getting too busy and I need a bold, fresh start. It not only covers an area quickly, but it emphasizes the texture of the collage, thereby not "wasting" any of the material underneath. I also use it to lift the paint, so that I can build layers gradually. Here is a video demonstration:

Wednesday, November 2, 2011

Collage with Magazine Papers

I am hearing from students in my workshops - both live and online - that it is a challenge to get magazine papers to lie flat on the collage substrate. So I thought I'd do a little video demonstration on how I get this to work. If you have found other methods that work, please share them in your comments!


Friday, June 24, 2011

Video Tutorial on Resist and Water Technique

Thanks for all your feedback and commentary on my Solstice Series. I am happy to hear so many of you are interested in a tutorial on this technique. I'll post the video first, and then a few finished pieces and pieces in progress.


Here is the piece demonstrated in the video. It is just the beginning of a piece:


A piece from my post the other day, only developed a little further:


This one makes use of the same technique, plus the gooey stuff in the middle, which is a demonstration for another time.


And one more in this Solstice Series:


FYI: My online workshop "Unlocking the Secrets of Color" is still open for registration. It begins June 29. The same is true for "Keys to Dynamic Composition". I have great groups in both workshops already signed up, and if you care to join either one, click here.

Thanks for visiting!

Friday, June 17, 2011

Friday Tutorial - Removing Paint with Alcohol

I have been in the encaustics obsessive mode this week, but did manage to make one little video tutorial. This is an edited version of a video that is included in my upcoming online class, Keys to Dynamic Composition.

If you have discarded or abandoned pieces of art done in acrylic paint, one way to resurrect them as backgrounds for new work is to remove some of the paint using regular rubbing alcohol. A piece can become particularly interesting if you have several layers of paint and collage to work with.


After removing some of the paint, you can apply gesso, more paint, collage, whatever you like, gradually building up layers of texture, color, and imagery. Here is the piece I worked on in the video:


I eventually cut it into a square and did a collage shape study on it:


This kind of study using cut out shapes is also in the online composition workshop. I did notice that the alcohol does not remove gloss gel or medium. I wonder why not.... But this means that you could prime your paper with gloss gel/medium, apply layers of acrylic paint, use alcohol to remove some of the paint, and the medium would protect the paper.

Meanwhile, stay tuned for more developments in encaustics.... I'm trying out different materials to create collage papers, and also some new (new to me) ways of creating texture. Thanks for visiting!

Monday, May 23, 2011

Digital Art Tutorials

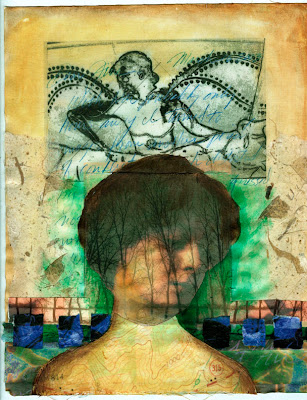
Cloth Paper Scissors Magazine has just put out a free e-book of four digital art tutorials, one of which is mine! I'm thrilled to pieces to be included in this e-publication, and it is FREE! You can download it HERE. In my tutorial I discuss how to alter images in Photoshop and print them out on fabric to use in fabric/paper collage. Here are a few pieces in progress using these techniques. The finished pieces are in the e-book.

"Forest Dream"


"Pedestal"

I want to show you in a little more detail how I got some of these layered images in Photoshop.

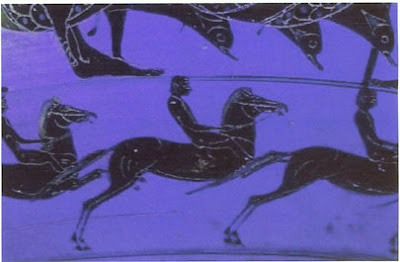
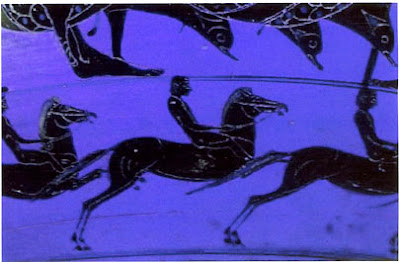
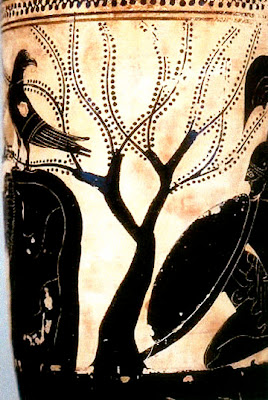
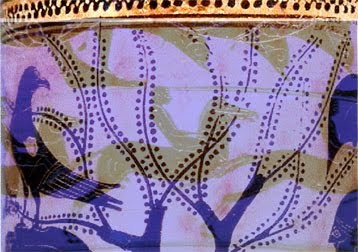
First, I scanned some images of these Greek vase paintings, and made them the same width, 5". (In this post they don't look the same width, but trust me).


In Image 1, I went to Image > Adjustments > Hue / Saturation and played with the hue slider to change the color:

Then I went to Levels (Image > Adjustments > Levels) and used the left and right sliders to bring up the highlights and darken the darks:

On Image 2, I simply used Levels to brighten the lights and darken the darks:

Now, here comes the fun part. Using the Move tool, I moved Image 1 onto Image 2:

This creates a layer over a background. In the layers panel, I double click on the layer (Image 1) and that opens the Layer Styles box. I play with the Opacity slider to make the image more transparent so you can see Image 2 underneath Image 1.

I then cropped the image using the crop tool:
Then I flattened the image, Layer > Flatten.

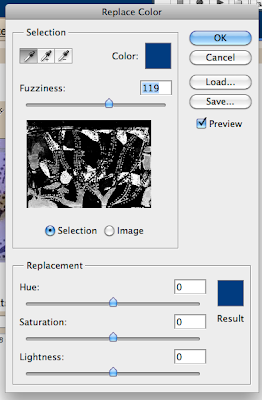
To selectively change the color I went to Image > Adjustments > Replace Color, which opens a dialog box like this:

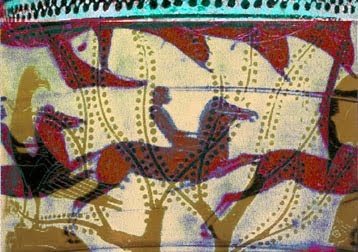
Click on the color in the image that you want to replace (I clicked the gray of the horses), then play with the hue, saturation, and lightness sliders to change that color. The Fuzziness slider determines how broadly you want to define your selected color, and that color will show up as white in box that shows the image. Here is my result:

Then, just for fun, I played with the Hue / Saturation tool again. Image > Adjustments > Hue/Saturation. Here is another altered version of the image:

I know this tutorial requires some basic knowledge of Photoshop, so I hope there are enough of you out there who can take advantage of it. Do get the free e-booklet from Cloth Paper Scissors! There are three other tutorials with fabulous art.

Friday, May 20, 2011

Resistance - Resists

As many of you know, this month's theme on the Sketchbook Challenge is "Can't Resist This". So I thought I would share one of my favorite techniques that makes use of a resist. In this case the resist is gesso, but you could use any kind of acrylic medium.

First I coat the sketchbook page or paper with a thin coat of gesso and let it dry thoroughly. Then I fill the page with acrylic color, in this case some reds, golds and purples. While the paint is still a bit wet I spritz on some water from a squirt bottle, and tip the page to get some drips. Let it dry a bit more (the water is still wet!), then blot with a paper towel. If I don't gesso the paper first, then it absorbs the paint more and you don't get the dramatic effect.

For a second kind of resist, I cut out a shape (in this case, a bird) in freezer paper and ironed it to the painted page. I learned this technique from one of our sketchbook challenge participants, Laura, who posts on our flickr site. Then, I painted around the freezer paper mask before removing it. Just a sketchbook page, not a finished piece.

Laura said she got the idea from a tutorial on the Sew Daily newsletter, in which they were making freezer paper stencils for quilts. Click here to view the article (Thanks, Laura, for the link!).

Here is my own video tutorial on the "Gesso Resist", or "Spritz and Blot" as I prefer to call it. I did include my own version of the freezer paper technique as well.


If the video doesn't work, click here to see it on YouTube.

Here is the piece from the video, stage one:

And after the freezer paper masks were removed and I'd painted over areas of it. Just an experimental piece, but I learned a lot from this experiment!


Thanks for visiting!


Thursday, March 31, 2011

Friday Drawing Practice, Drawing Through Freezer Paper

Hello, and welcome to the fourth post in the Drawing Practice Series. Today we're going to explore a kind of "gesture drawing", in which you work quickly and try to capture the gesture and volume of the object you are depicting. I chose my iron, just because it was handy.


In gesture drawing, you look at the object and at your paper, but instead of trying to capture the precise outlines or contours, you use your lines to capture more of the attitude of the object. In the following video I did speed up the gesture drawing a little, so it wouldn't take too much time, but I am definitely working quickly. I first do a drawing directly in my sketchbook. Then I draw on the back side of freezer paper that has been coated with black acrylic paint. The effect is interestingly textural.


This is the first gesture drawing:

This is the drawing on done with freezer paper:


Thanks for visiting! Hope you enjoy this practice.

Don't forget to go over to the Sketchbook Challenge today for my April theme.

Friday, March 25, 2011

Contours with Brush and Pen

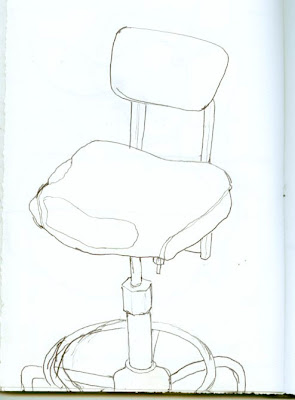
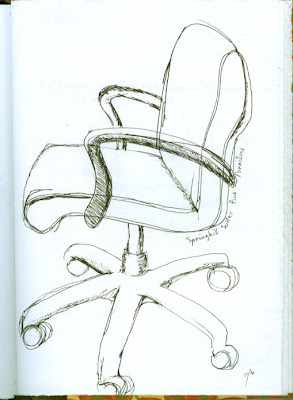
Welcome to the third of my Friday Drawing Tutorials. You've probably all heard of contour drawing: you look at the object as you draw it, only glancing down to your paper occasionally, and draw its outlines. Pretty straightforward. You can do just the very outer edge of the object, or some of the interior lines as well. The key to contour drawing is to SLOW DOWN, take your time, let your hand and your eye coordinate their movements. Use a pen. "Mistakes" are part of the experience.

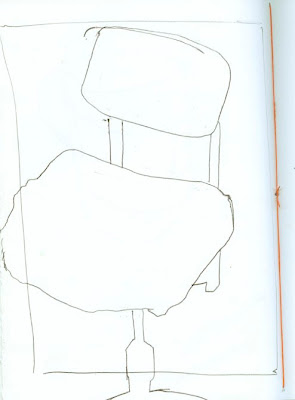
Here is an early attempt at a contour drawing of my chair:


After this drawing I did another, adding some of the interior lines:


You'll be amazed at how quickly your powers of observation increase when to take a few minutes once in a while to do a contour drawing. Here is another chair I did adding a bit of cross-hatch shading:


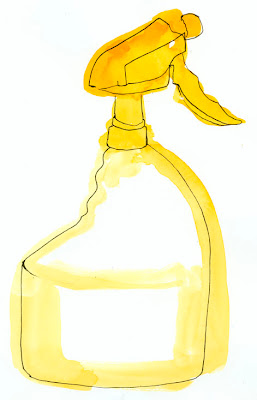
To make it a little more juicy, try doing a contour drawing with a big, wet watercolor brush. This makes you see the contours more generally, less in detail. After the watercolor dries, try a contour drawing of the same object in pen on top of the watercolor. Here is my spray bottle:

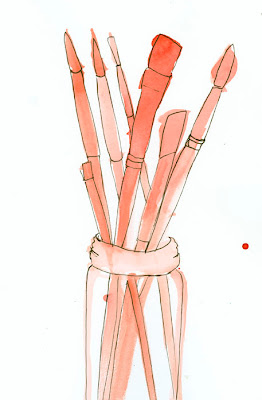
And a jar of brushes:

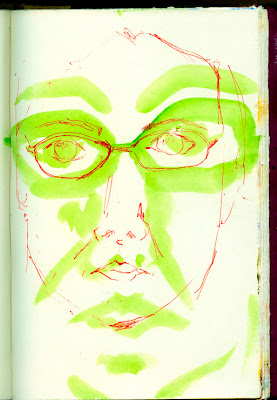
In the above two examples I tried to keep the pen drawing and the watercolor drawing together, so I fudged a little on the spray bottle nozzle while drawing in pen. In this self-portrait, I did the contour in watercolor, then the drawing in pen over it without trying to coordinate it.

Try both. See where it takes you!

Friday, March 18, 2011

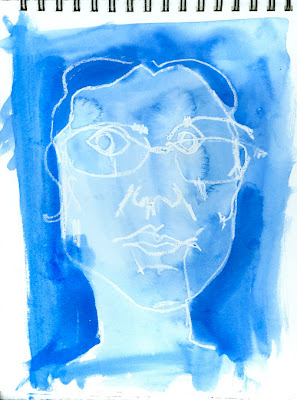
Letting Go of Looking Good: Blind Self-Portrait

If you’ve ever taken a drawing class, you are probably familiar with the idea of drawing what you see with your eyes, not what your mind thinks you should see. In other words, really look at what you are drawing and respond to that, rather than some mental notion of what the object is. We could all draw a coffee mug, for example, from an image in our mind. It is a different thing to really look at a particular coffee mug and trace its outlines. Drawing from imagination or memory and drawing from seeing are two different things, and practicing the latter will enhance your skills at the former.

In order to draw from seeing, we have to let go of any desire we you might have for the drawing to look like something. Paradoxically, that desire – that attachment to our idea of what something should look like – only gets in the way of seeing. Here is an exercise that will help you Let Go of Looking Good:

You will need:
Paper that will accept watercolor, several sheets
A white crayon
Watercolor paint, any color
Paint brush
Mirror
Cheap drawing paper or a sketchbook
Pen of your choice

1. First establish that this exercise is for your eyes only, unless you decide to share it.

2. Remember to approach the exercise with a sense of inquiry, not with a particular goal. It does not matter what the result looks like; what matters is that you approach it honestly and wholeheartedly.

3. Set up your mirror so you can see your face.

4. Slowly and carefully, draw your face with white crayon on the watercolor paper without looking at the paper. Look at your face in the mirror only. Take your time.

5. Brush water over the drawing, then paint over it in watercolor to reveal the drawing. Put it aside to dry, and repeat the process.


6. After a few blind self-portrait drawings, try a few with pen on the drawing paper or in your sketchbook, both blind and looking at your paper. Even when you are not doing a blind drawing, look more at the subject (your face in the mirror) than at the paper.

Making self portraits, for me, is one of the most effective ways of practicing letting go of looking good. This letting go not only helps you to see better, but it cultivates acceptance. Sometimes it is hard to accept how age affects how we look. We’re tempted to leave out that wrinkle or make our eyes look bigger and more youthful. Resisting this temptation not only encourages acceptance, but will result in much more beautiful and interesting drawings.

Monday, February 28, 2011

Panel Book Tutorial


A number of you have expressed interest in the Panel Book, so I finally got my act together enough to take a few photos and post a tutorial. This is not my invention, and I learned it from Elissa Campbell, at Blue Roof Designs, who contributed a gorgeous example to my book, Adventures in Mixed Media. Here's what you do:

1. Cut a piece of watercolor or other heavy paper 8"x22". Fold a 1/2" tab on one end; then measure three 7" sections and make folds at the three 7" marks. This should give you another 1/2" tab at the other end of the sheet of paper. You can cut an angle at the top and bottom of the 1/2" tabs if you like. Here is what it looks like:

Click on the diagram, or any of the photos, to get a larger image.

It is 8" high, so each panel is 8"x7", and each tab extends 1/2" at each end.

2. Repeat. Now you have two accordion pieces each with three panels. Here is how it looks folded:


3. Before joining the two accordion pieces, giving you a 6-panel book, mark and cut each panel according to the diagram:

The fold line is in the MIDDLE of the 7" panel.
First mark it like this with a pencil:


Then cut on the red lines indicated in this diagram:


Here is what it looks like, cut but not folded yet:

4. Now fold at the fold lines, but not on the panel itself. I do this by folding the page so that the creases on either side line up, leaving the panel flat.

Here is what it looks like standing up after you've folded it:


5. Repeat the marking, cutting, and folding on all six panels. You may want to mark them all first, then cut them all, then fold. In any case, you end up with two accordion folds, each with three panels.

6. Join the two accordions together by cutting one tab off of ONE of them. Glue the tab of the other to the non-tabbed end of the first one. Make sure your panels are all lining up the same way.

7. Make two book boards that are 8.25" tall x 5.5" wide. Cover one side with decorative paper (I'm not including instructions for that here. If you need them, e-mail or leave a comment). Cut end papers (or cover linings) that are 1/4" smaller than the book boards, 8"x5.25". Check to make sure they fit. BEFORE gluing down the end papers, glue the end tabs of your accordion onto the book boards. The tabs are sandwiched between the book board and the end paper. Maybe these photos will make it clear. Here's a top view:


And a view from inside the back cover:


And here is a top view of the finished book, showing off the panel configuration.


Let me know if any of this needs further explanation. Thanks for visiting!