Tuesday, April 10, 2012

Mono Prints with Gel Plate

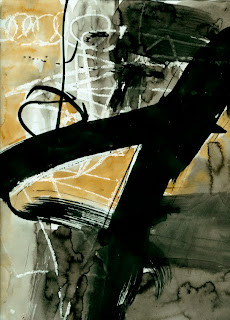
I am VERY busy with my two online classes, Sketchbook Practice and Text and Image, so I'll be posting a little less frequently for the next six weeks or so.  However, I couldn't help sharing this with you.  I'm sure many of you have heard of GelliArts' gel printing plates.  They are like very firm clear jello, but they are permanent, and you don't eat them.  For more information and video tutorials, go to the GelliArts blog or web site.  I've always wanted to try gelatin printing, but never got my act together to make trays of stiff jello.  This synthetic gel plate has been a blast.  I've added it to my vocabulary of scribble painting tools, and I'm exploring ways of making prints.  Here are a few images from recent explorations.

 This was made by pressing texture plates into the paint before printing; masking with sequin waste, and using my spritz-blot technique.

I had the idea of using string and thread as masking tools, and here is what I came up with:

This one is the "ghost prints" of another string paper:

On these next two I used "Plan B", described on GelliArts' blog.


In my Mono Print Collage class, which I'm offering at Studio Place Arts in Barre, VT on April 20, we will focus on making richly printed papers, and then use those papers in collage.  I am, however, also figuring out ways of making prints, and I have a couple of early attempts to share with you.


I start with a sheet of printmaking paper cut to 8"x10", which is the same size as my printing plate.  I mask off the edges with 1.5" low-tack artist's tape.  Then I start printing, masking, collaging, and printing some more.  I have yet to get a handle on this technique, but it seems to offer loads of possibility. Let me know of your experiences with mono print, gel plates, or anything else!

Sunday, April 1, 2012

Faces: THIS IS NOT MY WORK

Every once in a while I come across some art on the web that absolutely blows me away.  This morning it was a comment from Uber Luciano Gatti on one of my flickr images (well, he added it as a favorite) which sent me to his flickr site.  Here are a few images from Uber's "Faccio Facce" set:


I was reminded of Tina Bering's "100 Girls on Cheap Paper".  I refer to her book a lot for inspiration, even though I don't draw faces very often, and it is one I recommend for my Sketchbook Practice class.  Not a how-to at all, just pure inspiration.  A  couple of images:


What I love about these pieces, both Uber's and Tina's, is the degree to which the process and material are evident.  The abstract aspects of them are as in-your-face as the expressive quality of the faces.  Learning to draw a perfect likeness of a face is as skill that can be learned with practice.  But this individual, idiosyncratic interpretation of a face is so gut-wrenchingly expressive.  I think it comes with just working and working and working, and gradually finding your own way with materials, techniques, imagery, and ideas. 

Friday, March 30, 2012

Playing With Ink Part 2

OK, here is what I did with the papers that resulted from Playing With Ink.  First I made at least a dozen 7"x7" backgrounds using only black acrylic paint.  For some I applied the paint straight up, then did a wash of it by adding water.  For a person who loves color, I sure am enjoying this black and white thing!


I just wanted to show one of them at a larger size.
So then I cut and tore up all of the ink experimental "drawings" I did, and added one, and in some cases two pieces of collage to these black and white backgrounds.


This one I did on a white background.
We'll be doing some of this sort of thing in my Collage Journeys in Vermont workshop this August.  We'll learn loads of techniques for painting papers and building a stash of collage materials, and then focus on the foundations of abstract composition.  We'll include at least one session of "collage marathon", in which we make collage after collage after collage: don't think, just do, like I did in the above series.  See the full description and details here.  And feel free to e-mail me if you have any questions or suggestions.

Tuesday, March 27, 2012

One more Sketchbook Practice Video

Couldn't resist posting this. I will get  back to Part 2 of the Ink Experiments later this week.

I am gearing up for my Sketchbook Practice class, which starts next week, and I can't WAIT!  I have twenty students so far, and room for more if you are interested.   Enjoy this video in any case.  I'm still trying to figure out how to add sound to it.

Friday, March 23, 2012

Playing with Ink

I felt like making a bunch of STUFF today, and then cutting it all up to reassemble into collage.  So, I got out the India ink and a few other materials, the cheap drawing paper, and started. Oh, and then I brought one of my chickens into the studio, and she gave serious thought to making her own sketches. The chicken begins at about 6:52, so feel free to scroll ahead.

 Here are just a few of the results, on 9"x12" cheap paper.


I will cut these up and make some collages with them.  Stay tuned for the next episode.  This is the sort of thing we'll be doing in Sketchbook Practice.

Sunday, March 18, 2012

Encaustics Show in Santa Cruz

An online acquaintance of mine, Sandy Sudbrink, of Santa Cruz, kindly went to the Pajaro Valley Arts Council to see a show in which I have three pieces.  AND SHE TOOK A PHOTO OF MY WORK!!!  How cool is that!  Take a look at Sandy's website of beautiful watercolors.  I particularly like the architectural piece - they have a stillness to them that I find really intriguing.

Here are my pieces in the show, called "WAX: Contemporary Encaustic Works":

If anyone wants to know anything more about encaustics, go here.  If you want to take an encaustics workshop with me, I'm teaching one at Art Unraveled, on Monday, August 6; and again at Art and Soul on Tuesday, October 2.  I'm offering a workshop called Paper and Wax at the Guilford Art Center in Guilford, CT the weekend of October 13 - 14. 

Thanks for visiting!

Wednesday, March 14, 2012

Sketchbook Practice Workshop

Here is a little video I made to show off my new Sketchbook Practice Workshop, which starts on April 4, online.


Starting April 4, 2012
Just for fun, here is a recent picture of me in my studio with Buffy:

Saturday, March 10, 2012

Studio "Orgainization"

I agreed to have my studio included in this summer's issue of Studios Magazine, thinking that it would be a good excuse to tidy up and give my lack of organizational skills some serious thought.  Writing the article and having my studio photographed achieved both goals.  Taking a hard look at my relationship to organization and tidiness revealed the following insights:
  •  First of all, it didn't take a monumental effort to tidy up, because I have made monumental efforts to create homes for everything in my studio.  Monumental because organizing does not come easily to me. Having a home for everything, even if I don't put things away, is immensely soothing.  Clutter doesn't bother me so much if I know I can put things away when necessary.  My efforts in recent years have really paid off.
  •  I really can come up with organizational systems, like the wall I build on the back edge of my worktable you see above, if I put my mind to it and analyze the problem.  In this case, the problem was: everything gets buried on top of the worktable, and I can see it.  I need everything in front of me where I can find it and put it away.  Solution: put everything in front of me.
  •  I have made some organizational units modular, so I can take advantage of awkward spaces and move them around easily.  My bookshelves consist of cubes built of pine.  I have them stacked at the end of my east worktable, but they also fit under the gable roof in a tight space behind the new wall (see the first post on Working Large).
 

I elaborate on all of this in the article in Studios Magazine, so I'll keep this short.  My point here is that I discovered I'm not as bad as I'd thought I was.  I'm sure an organized person could come up with more efficient solutions to my studio space, but I have come up with workable solutions.

Here are a few more shots of my "Working Large" space:

 The front gable wall:
 

 The New Wall, where I hang works-in-progress:

My makeshift rolling paint cart:
 

My latest work-in-progress:

Thursday, March 1, 2012

Loose Sketchbook Pages


In the process of making the large pieces (see previous posts on working large) I used a lot of paint-lifting technique: apply paint -> place a sheet of paper over the paint -> brayer or rub the back of the paper -> remove paper.  To see this technique take a look at the video in Working Large, and scroll up to about 9:30.  This results in many sheets of 9"x12" cheap drawing paper with gorgeous print-making like paint impressions.  I re-use the sheets several times, so they can get kind of interesting.  I thought about binding these sheets into a sketchbook, but decided instead to use them for experimentation, only in individual sheets. 

Here I experimented with India Ink, graphite crayon, and white China marker over the paint lifting sheet, which has only acrylic paint.

I started building on the grid established in the paint-lifting sheet, and added some scribbling in graphite crayon.

I got into a DOT study here, using acrylic paint, a brush, and the eraser end of a new wood pencil. 

Just more acrylic paint on this one.  A beginning.
  

More dots:
 

Here I'm just playing with brush stroke sizes to create the sense of depth:

An ink doodle, and then more paint:
  

 This byproduct of my new large paintings is a great excuse for playing with line, form, pattern, etc., and for experimenting with new materials (in this case graphite crayons - I used 9B, and white China marker, as well as India ink).   None of these can be "finished" drawings, because the paper is too flimsy.  This is quite liberating, as it frees me to keep milking them for new discoveries. 

As you may know, I will be teaching a Sketchbook Practice Workshop online beginning April 4.  We will be cultivating this sense of play and experimentation in order to broaden your                           abilities and sensibilities.  I've decided to include a section on working on large loose drawing paper, and also working tiny, just to stretch your sense of scale.  Fun fun!